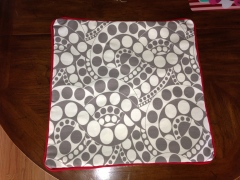
 Happy Wednesday everyone! I hope you all are enjoying your summer as much as I am. The sun has been shining constantly and we have been taking full advantage with barbeques, pool days, park trips, and even a few jaunts to Disneyland. Fall will be here before we know it, so there is no sense in wasting this sunny weather. Since we have been spending so much time outdoors, we have been sprucing up our patio outback. We have been trying to creating a nice peaceful and relaxing atmosphere.
 I am a huge fan of the upcycling movement. It’s one of the few ways I have managed to go green. My newest project has combined my love of upcycing with my sewing obsession. And I have created a new project for those of you who would like to do some sprucing up of your own. Today we are going to be making some pillow covers for some old throw pillows. They’re great for all of your indoor and outdoor furniture. I made some for the patio furniture on our new outdoor oasis. So let’s get started!
Pillow Cover Tutorial
Materials:
Throw Pillow (any size)
2/3 yard of Indoor or Outdoor Fabric
3/4 yard of cording
1/4 yard of Cotton fabric (accenting color)
scrap piece of felt
Scissors
Sewing Machine
Thread
Matching buttons (optional)
Instructions:
We are going to begin by cutting your fabric. The throw pillows that I am making covers for are 18″ x 18,” so all of my measurements will correspond with them. You may adjust your calculations to accommodate your pillow size. Just allow for a one inch (1″) seam allowance on all sides.
From Indoor/Outdoor fabric
Front Piece – cut one square piece for front surface 20″ x 20″
Back Pieces – Cut two rectangle pieces – 20″ x 15″
From Coordinating Cotton Fabric
Cut three strips – 2″ wide
First we will attach our cotton fabric strips together. Using your sewing machine, attach your three strips together at by each end, so you have one long strip.
Next, using an iron, press the seams flat on your strips.
Now, using your iron, we are going to press the raw edges of your back pieces of fabric. One each rectangular piece of fabric, along the long edge fold a 1/4″ of fabric over and press it with the iron. Then fold the fabric over one more time and press it with the iron. Your raw edge should be completely covered now.
Next, using your sewing machine, run a straight stitch along the edge of each rectangular piece of fabric to hold your finished edge in place.
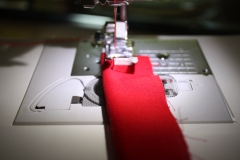
Now we’re going to make the piping for your pillow. Wrap the seam side around of your fabric strip around your chording. Using a straight stitch along the side of your chording to encase it in the fabric.
Your chording should be completely encased in fabric when you are finished.
Next, pin your cording on the right side of your front piece of square fabric. Start at one of the corners, leaving an inch or so of extra chording hanging over the edge. Run the chording along the entire outer edge of the fabric. The raw edges of the fabrics should be matched up.
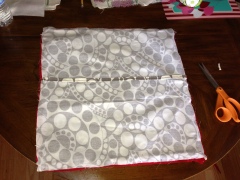
Next lay one of your rectangular pieces of fabric, right sides together, atop of the front piece. The finished edge should lay in the middle. Pin it in place. Lay your second rectangular piece atop of your square piece, so the finished edge overlaps the other. Pin it in place.
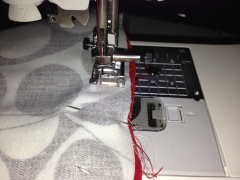
Next we are going to finish our pillow cover, by running a straight stitch all the way around the circumference of your pillow. Run the stitch as close to the chording as possible.
Turn your pillow cover right side out. And your cover is finished.
Now for the flower accent for your pillow.
-Using your indoor/outdoor fabric and coordinating cotton fabric, cut eight large circles (3″ wide) and eight small circles (1.5″ wide). You should have 16 circles from each fabric. 32 circles in all.
-Place one cotton circle on the backside of each indoor fabric circle.
-Fold the sides of your circles inward creating a petal.
-Using your needle and thread, attach your petals to your scrap piece of felt creating a circle.
-Next, do the same with the smaller circles on top of the previous layer. You can add buttons to the center of your flower, if you like. It’s optional.
Our final task is attaching your lower to your pillow. Pick your placement and attach it to your pillow using a needle and thread.
Insert your pillow and toss it on your couch or patio chair. And sit back and relax and enjoy your craftiness.
ENJOY!!!
